Příprava na ponor
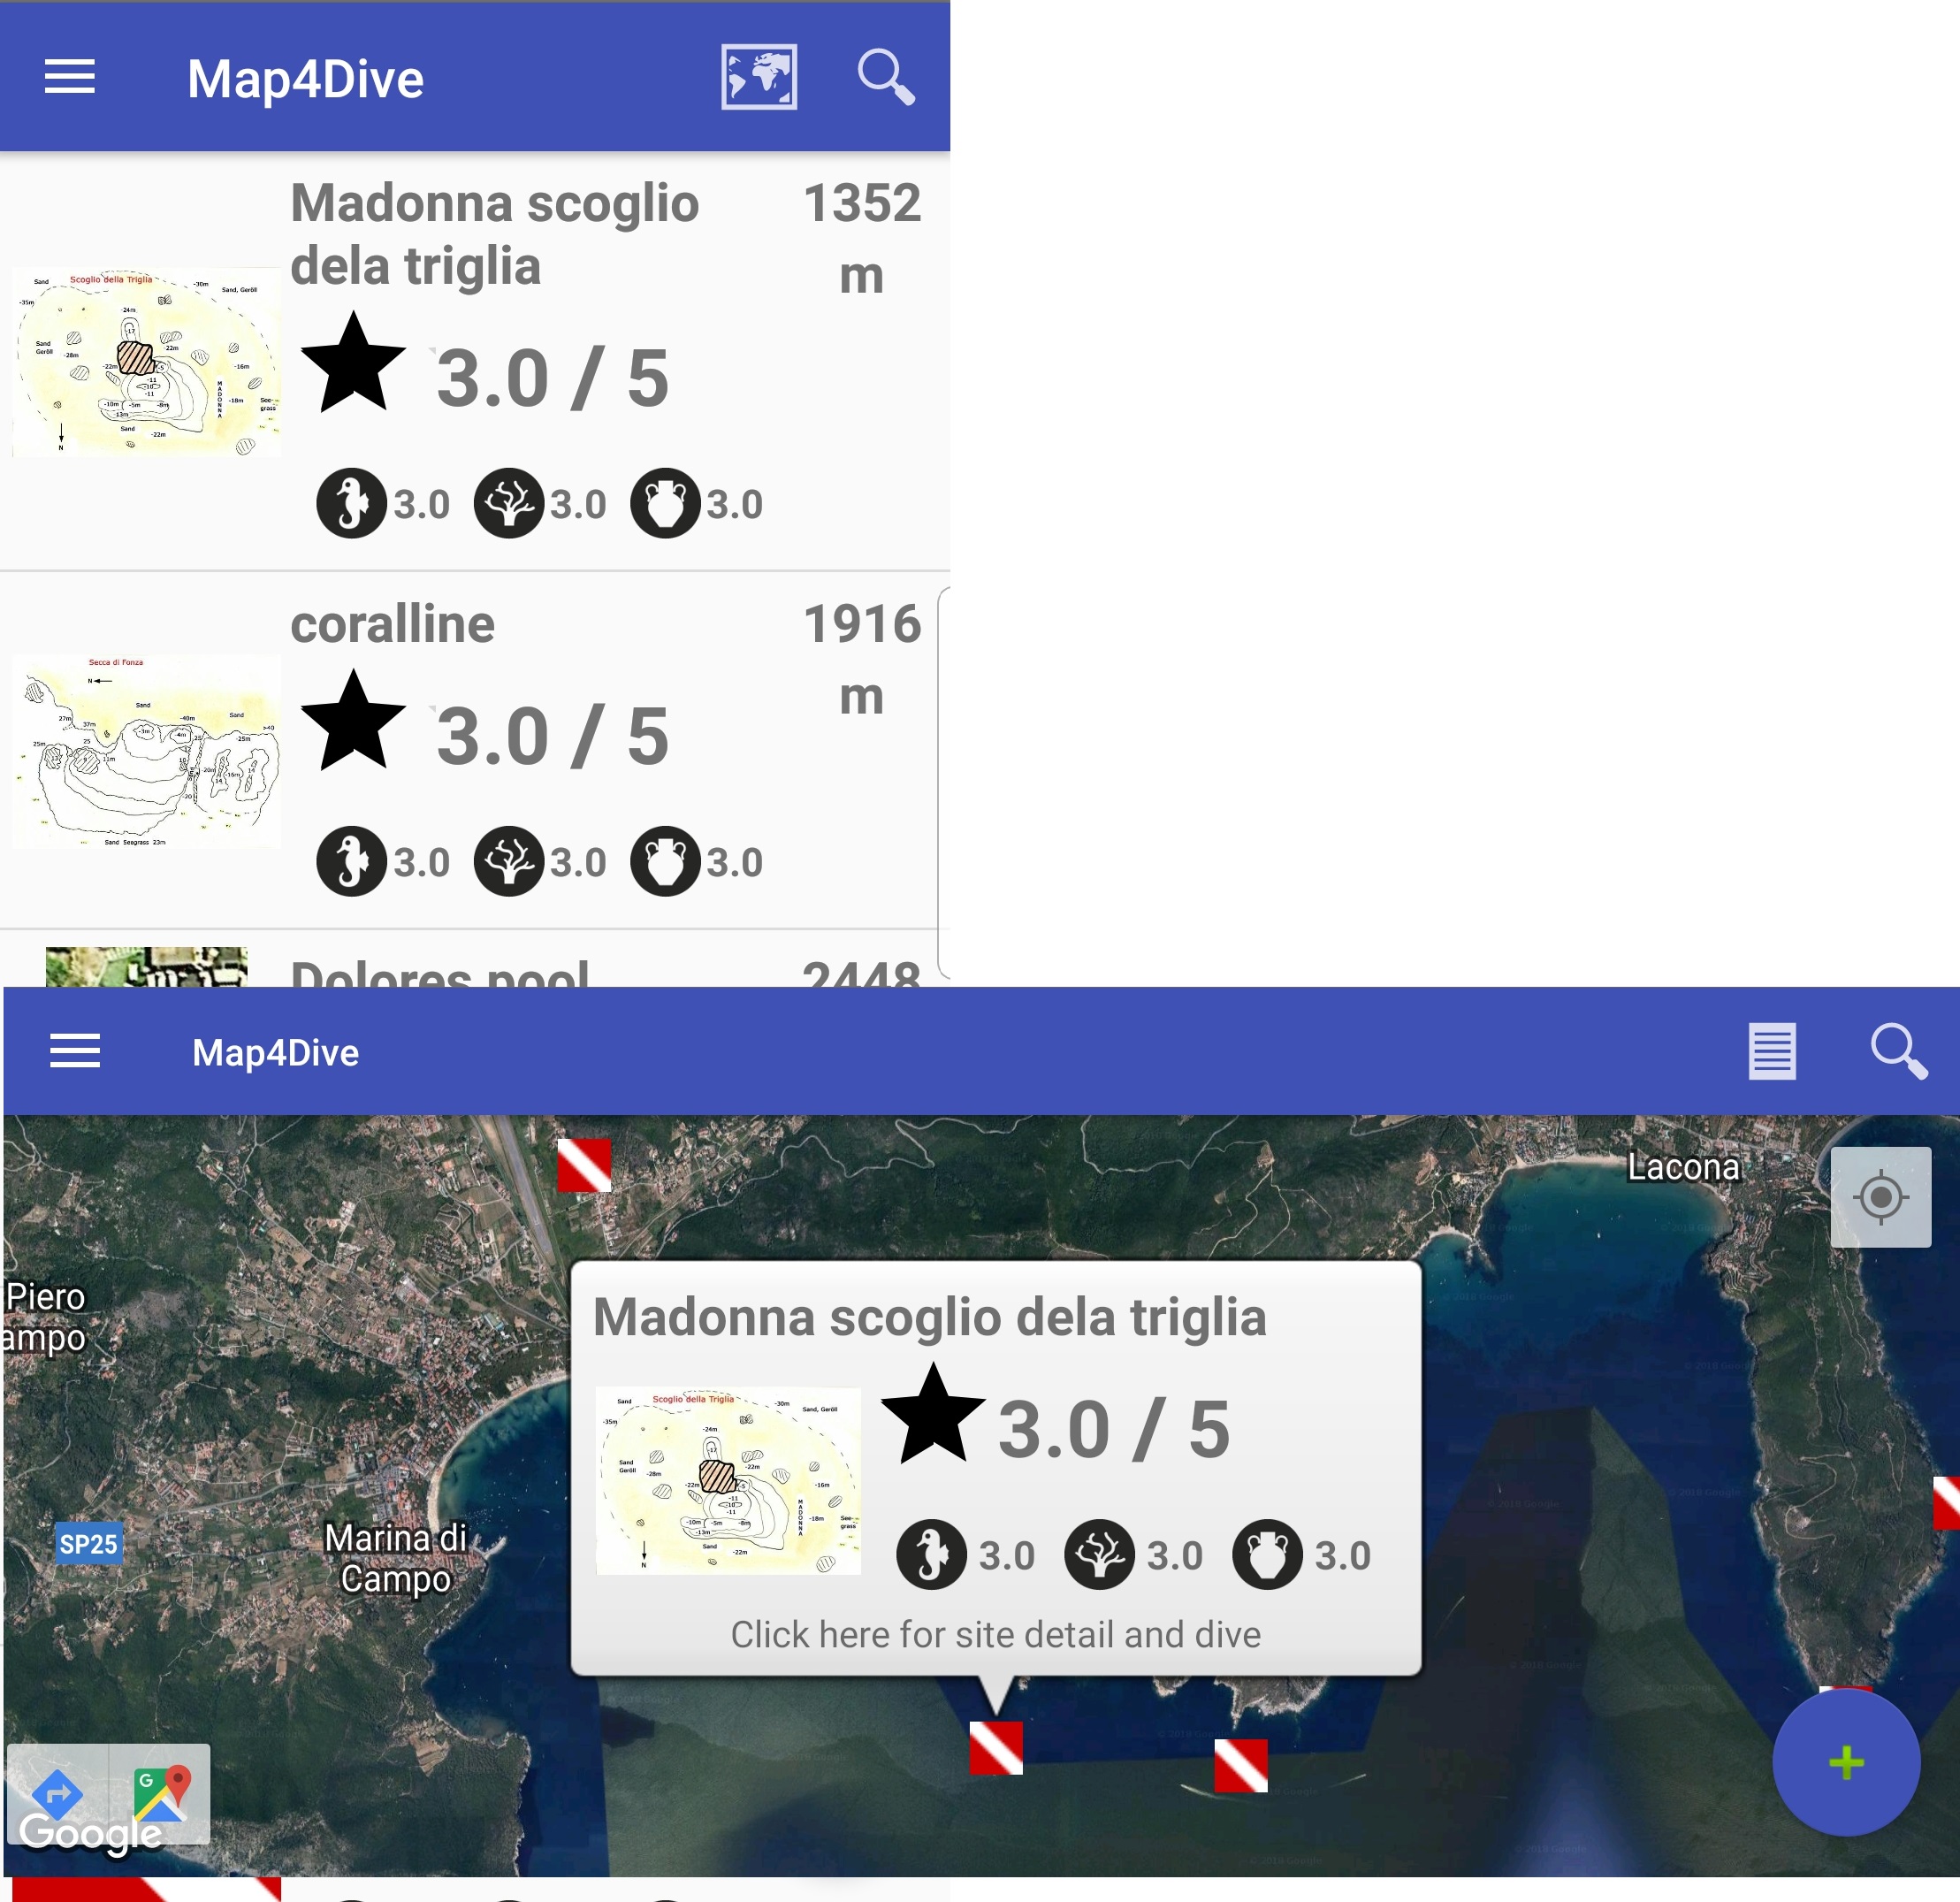
Po přepnutí do obrazovky ponoru, můžete podrobně prozkoumat lokalitu a naplánovat ponor.
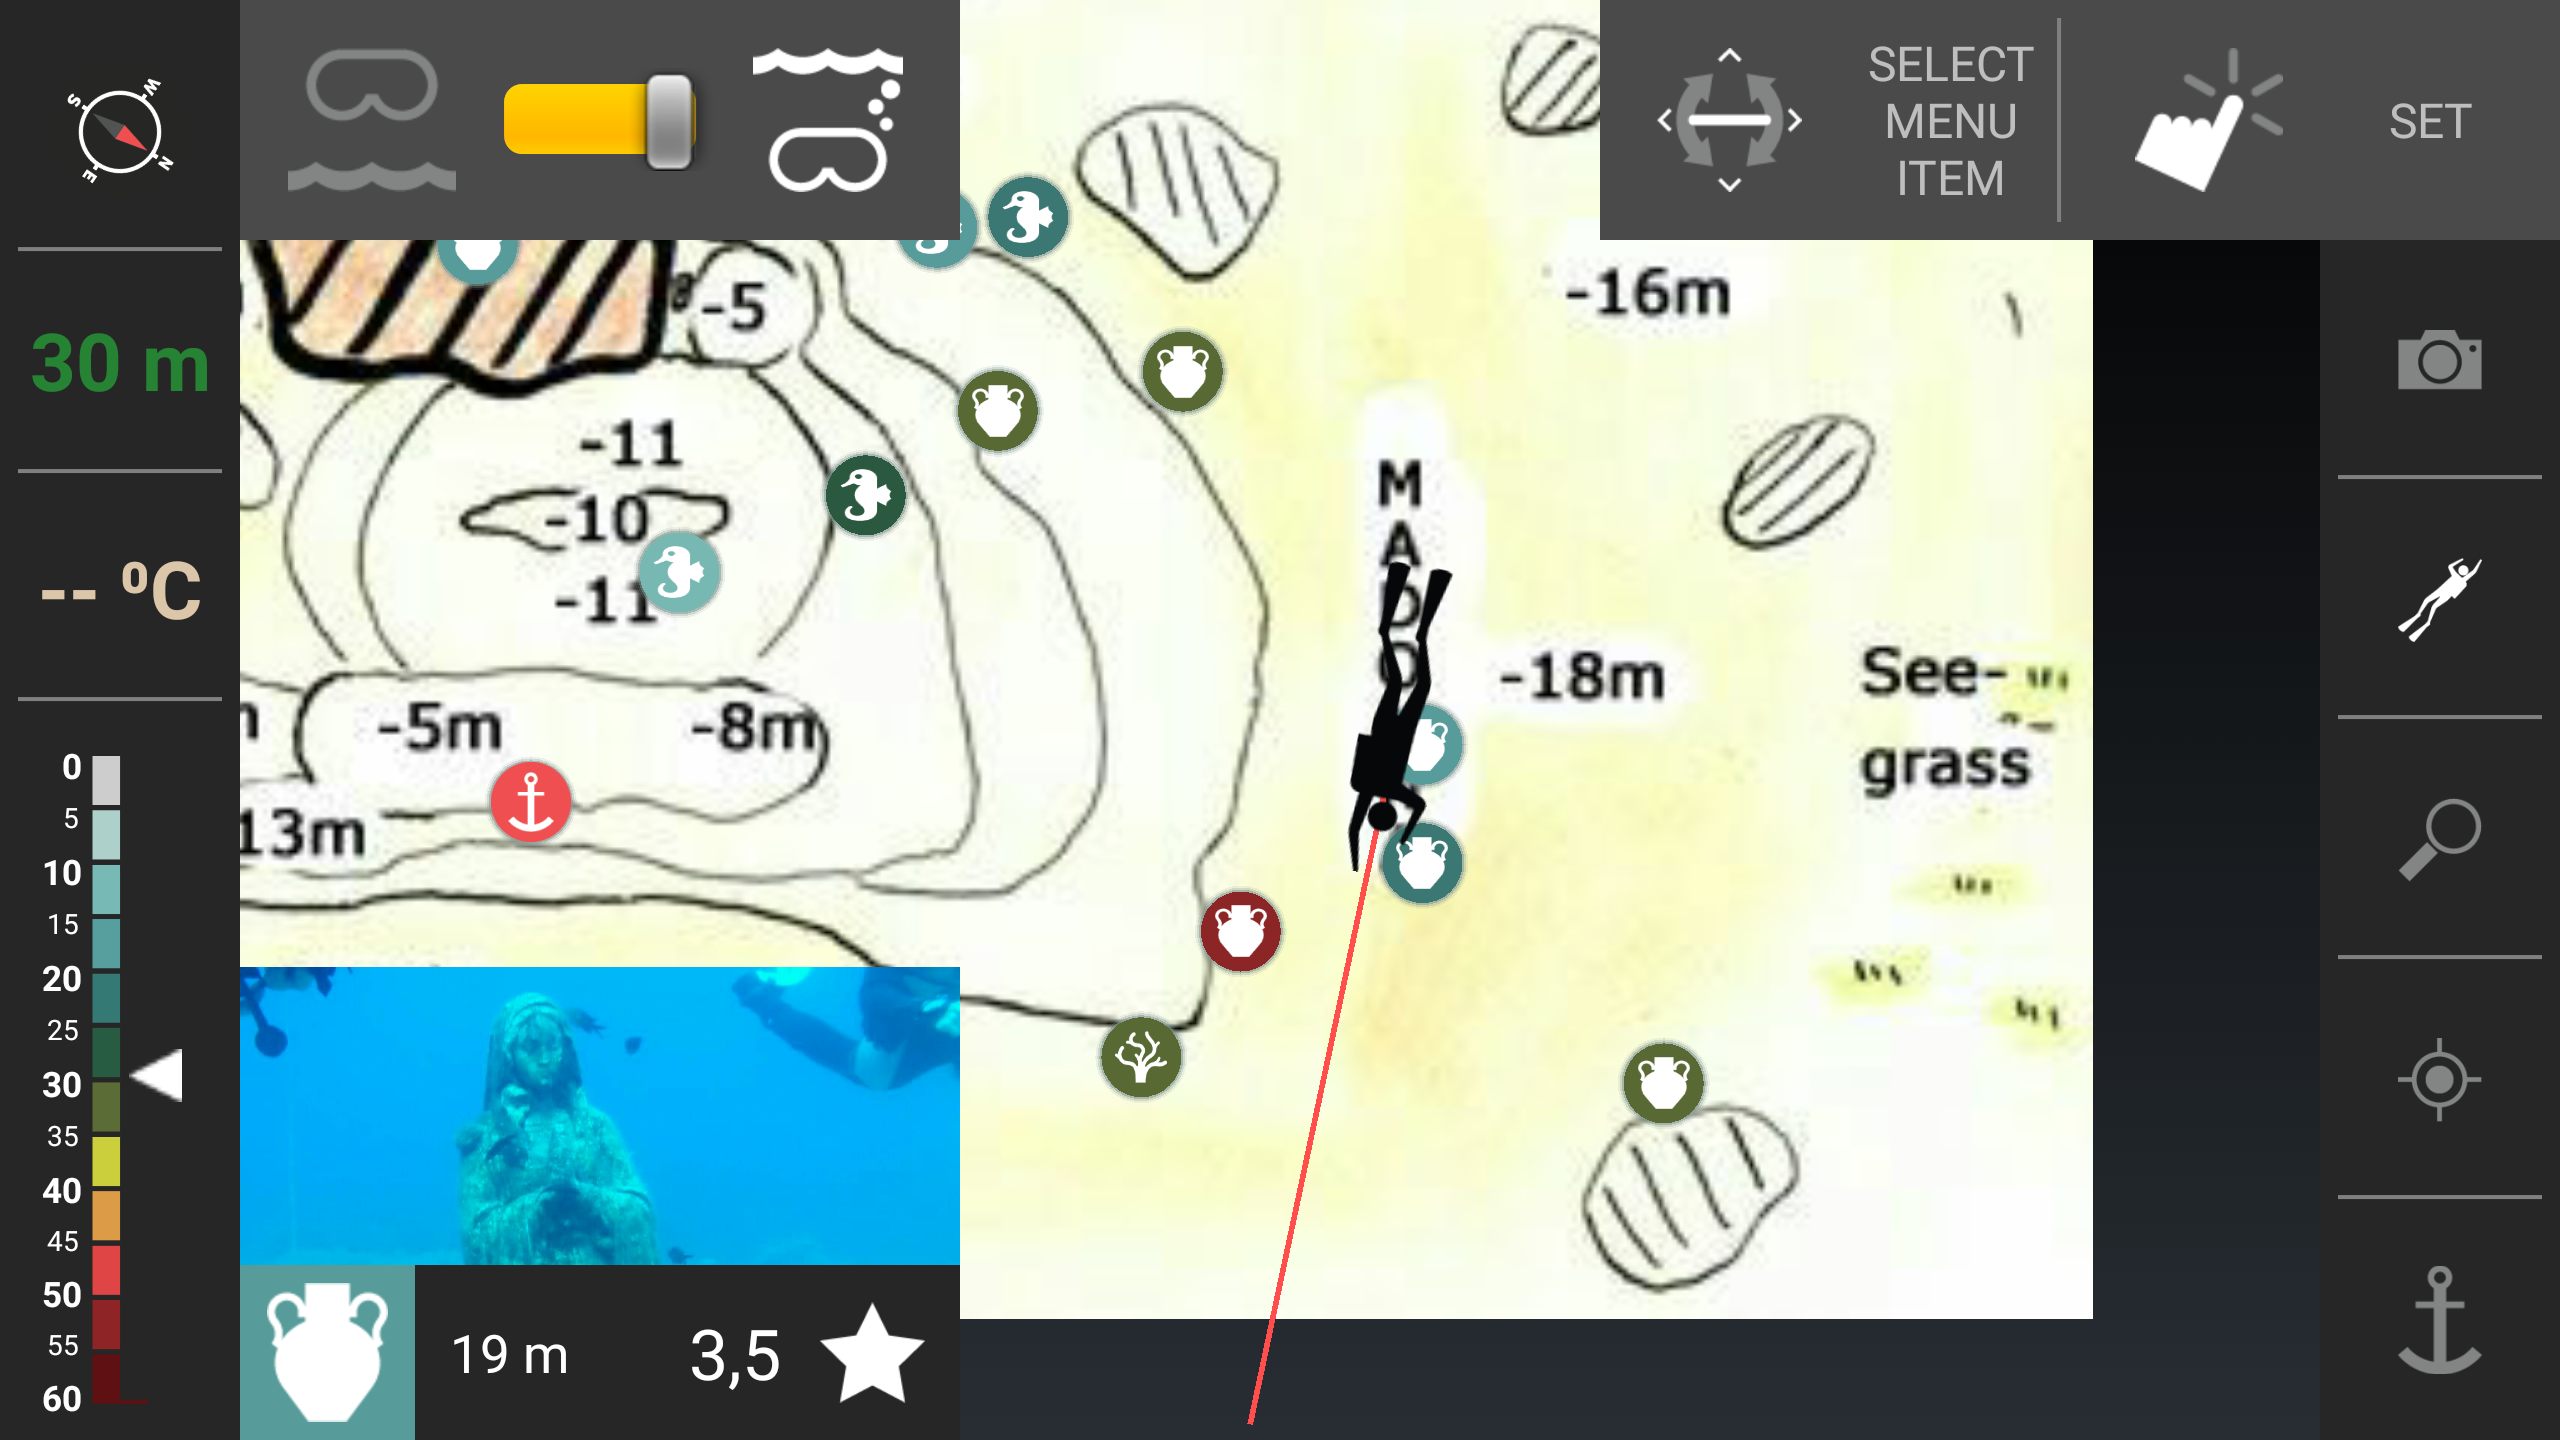
Je zobrazena podvodní mapa lokality se všemi dosud zaznamenanými objevy.
Mapu lze zvětšovat, zmenšovat a posouvat, aktuální pozici na mapě označuje ukazatel potápěče ve středu obrazovky. Při najetí na objev je zobrazen jeho náhled.
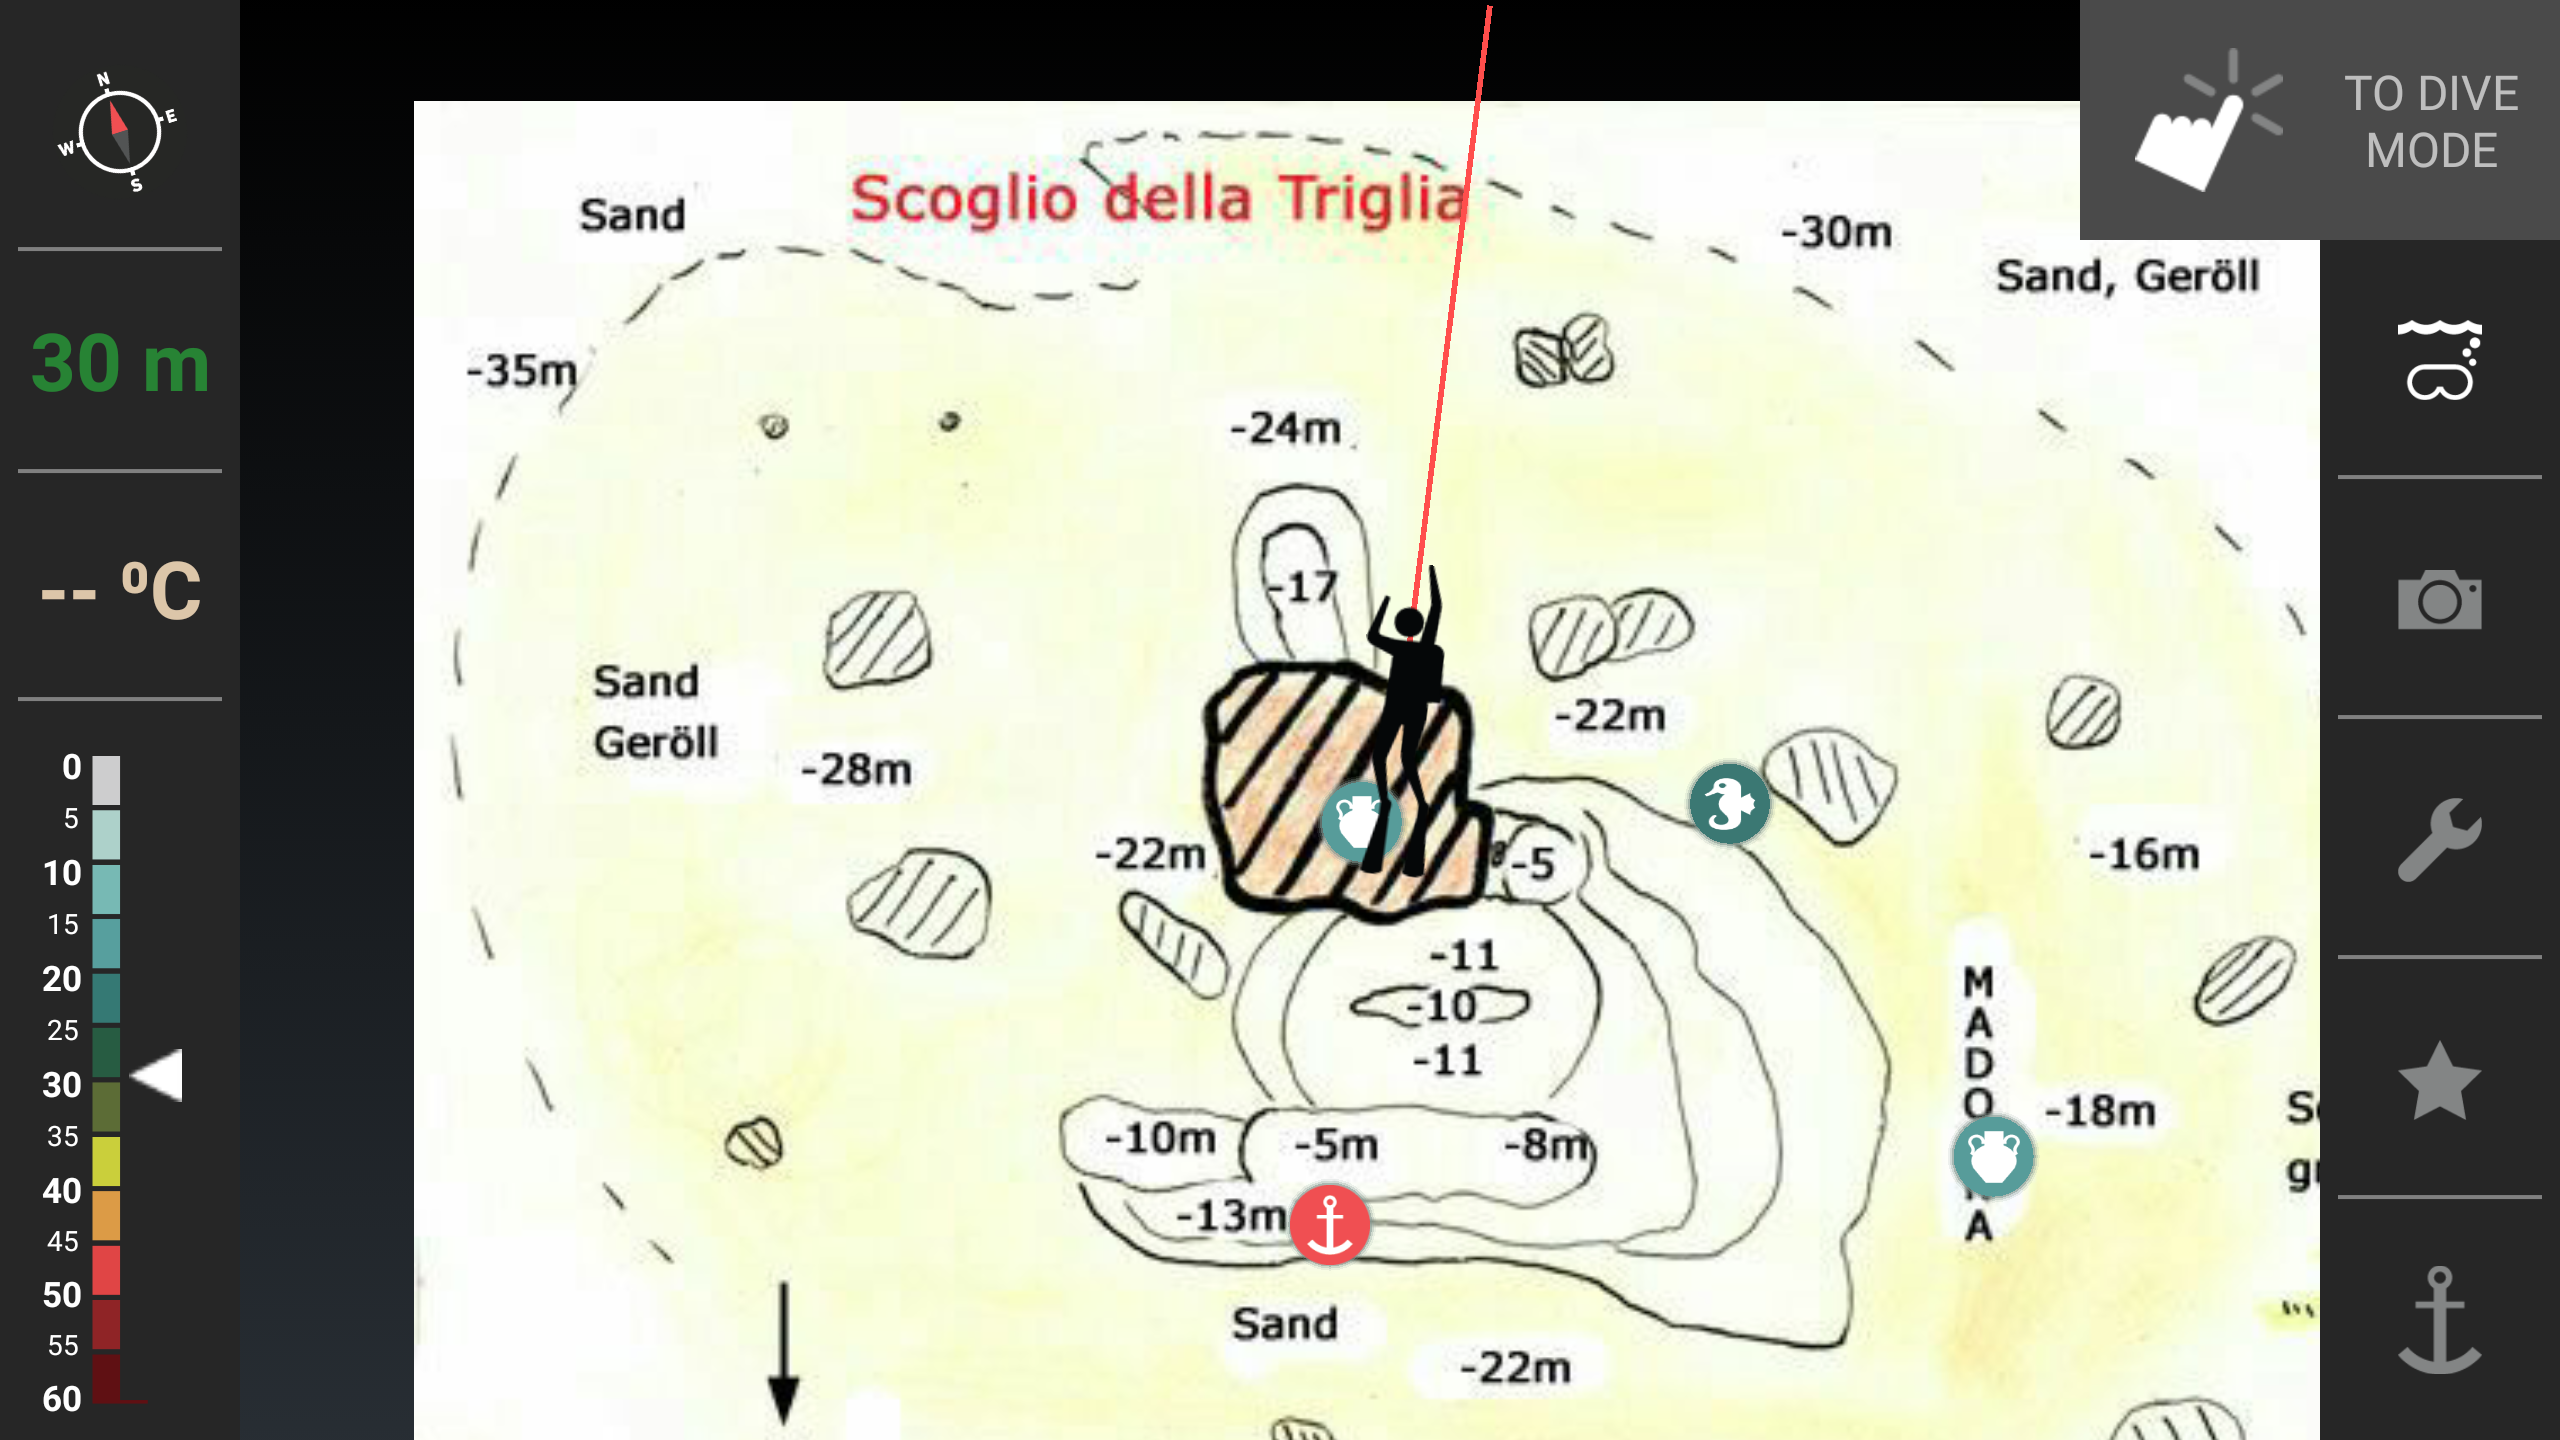
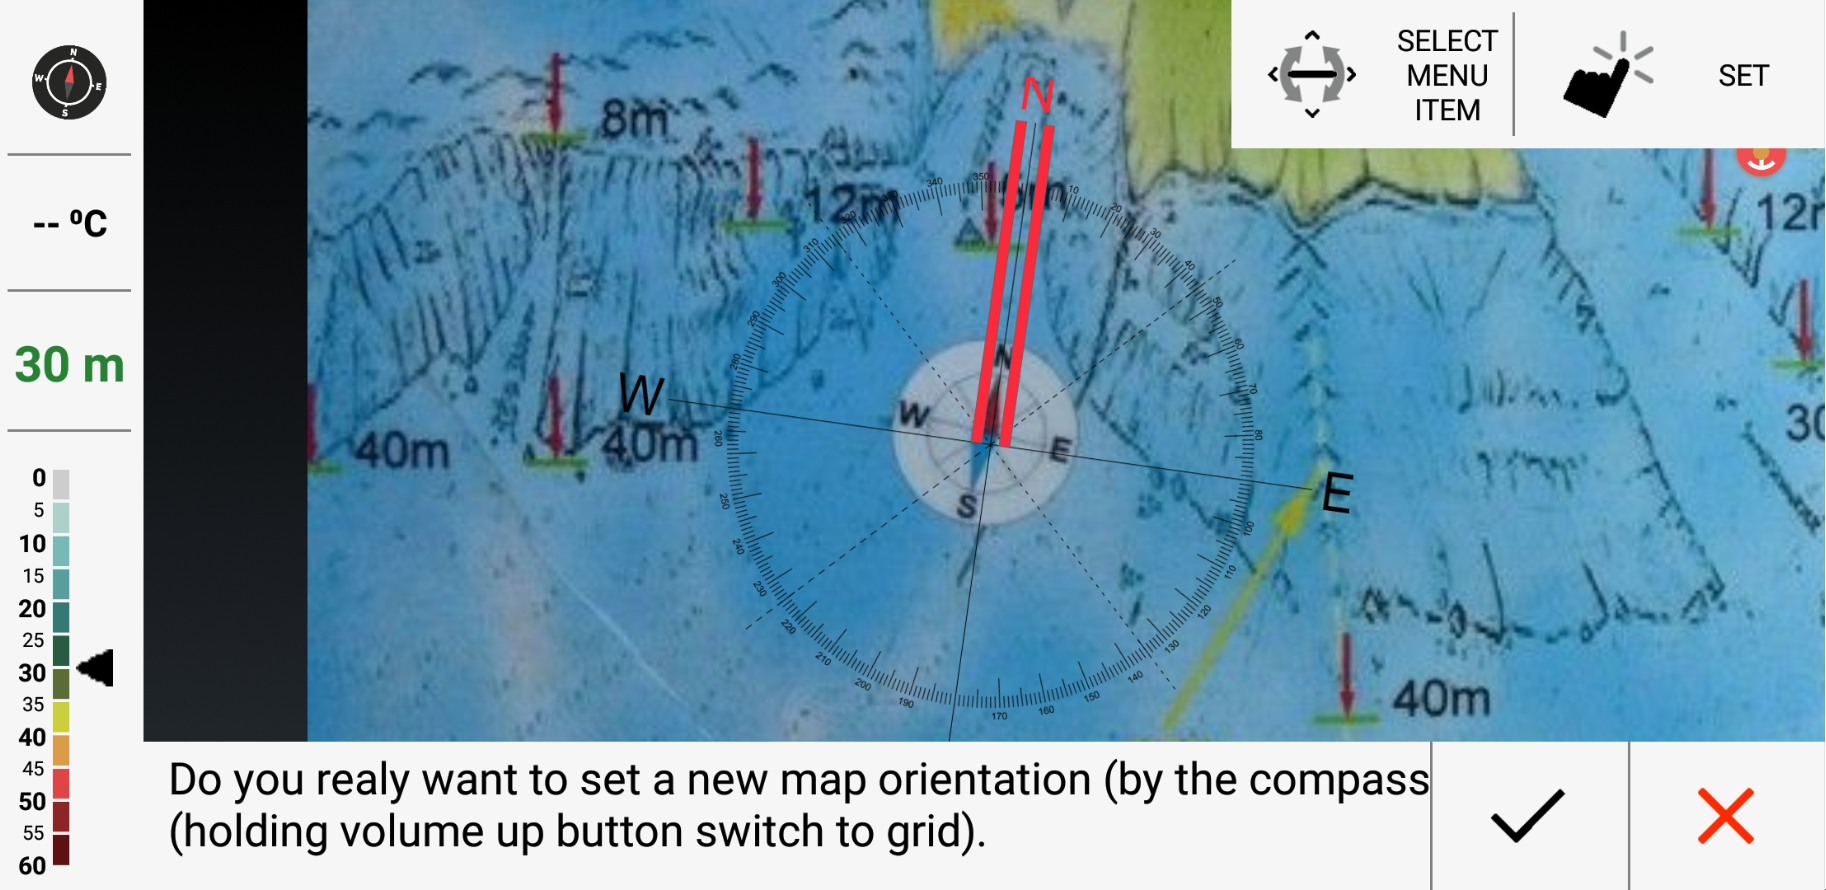
Před zahájením ponoru nastavte Vaši výchozí pozici (kotvu) a zorientujte mapu. Aktuální umístění kotvy je indikováno červenou ikonou kotvy v mapě.
U správně orientované mapy pak červený ukazatel směru ukazuje Vaše aktuální směřování a usnadňuje navigaci (skutečný azimut je indikován ikonou kompasu v levém horním rohu obrazovky).
Rozhodněte se, které objevy chcete během ponoru navštívit a naplánujte ponor.
Před ponořením nezapomeňte přepnout do podvodního módu - přepnutím přepínače SURFACE/DIVE mode.
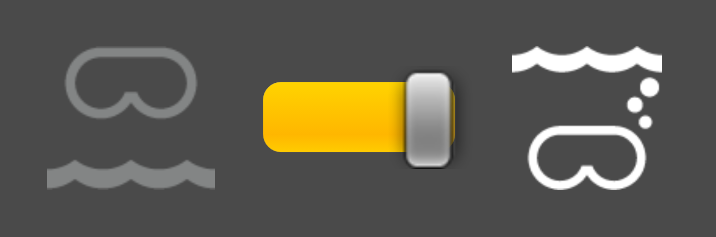
Po zanoření již nebude dotyková vrstva Vašeho mobilu fungovat - podívejte se, jak ovládat aplikaci pod vodou.
Co dále při ponoru (pod vodou) »
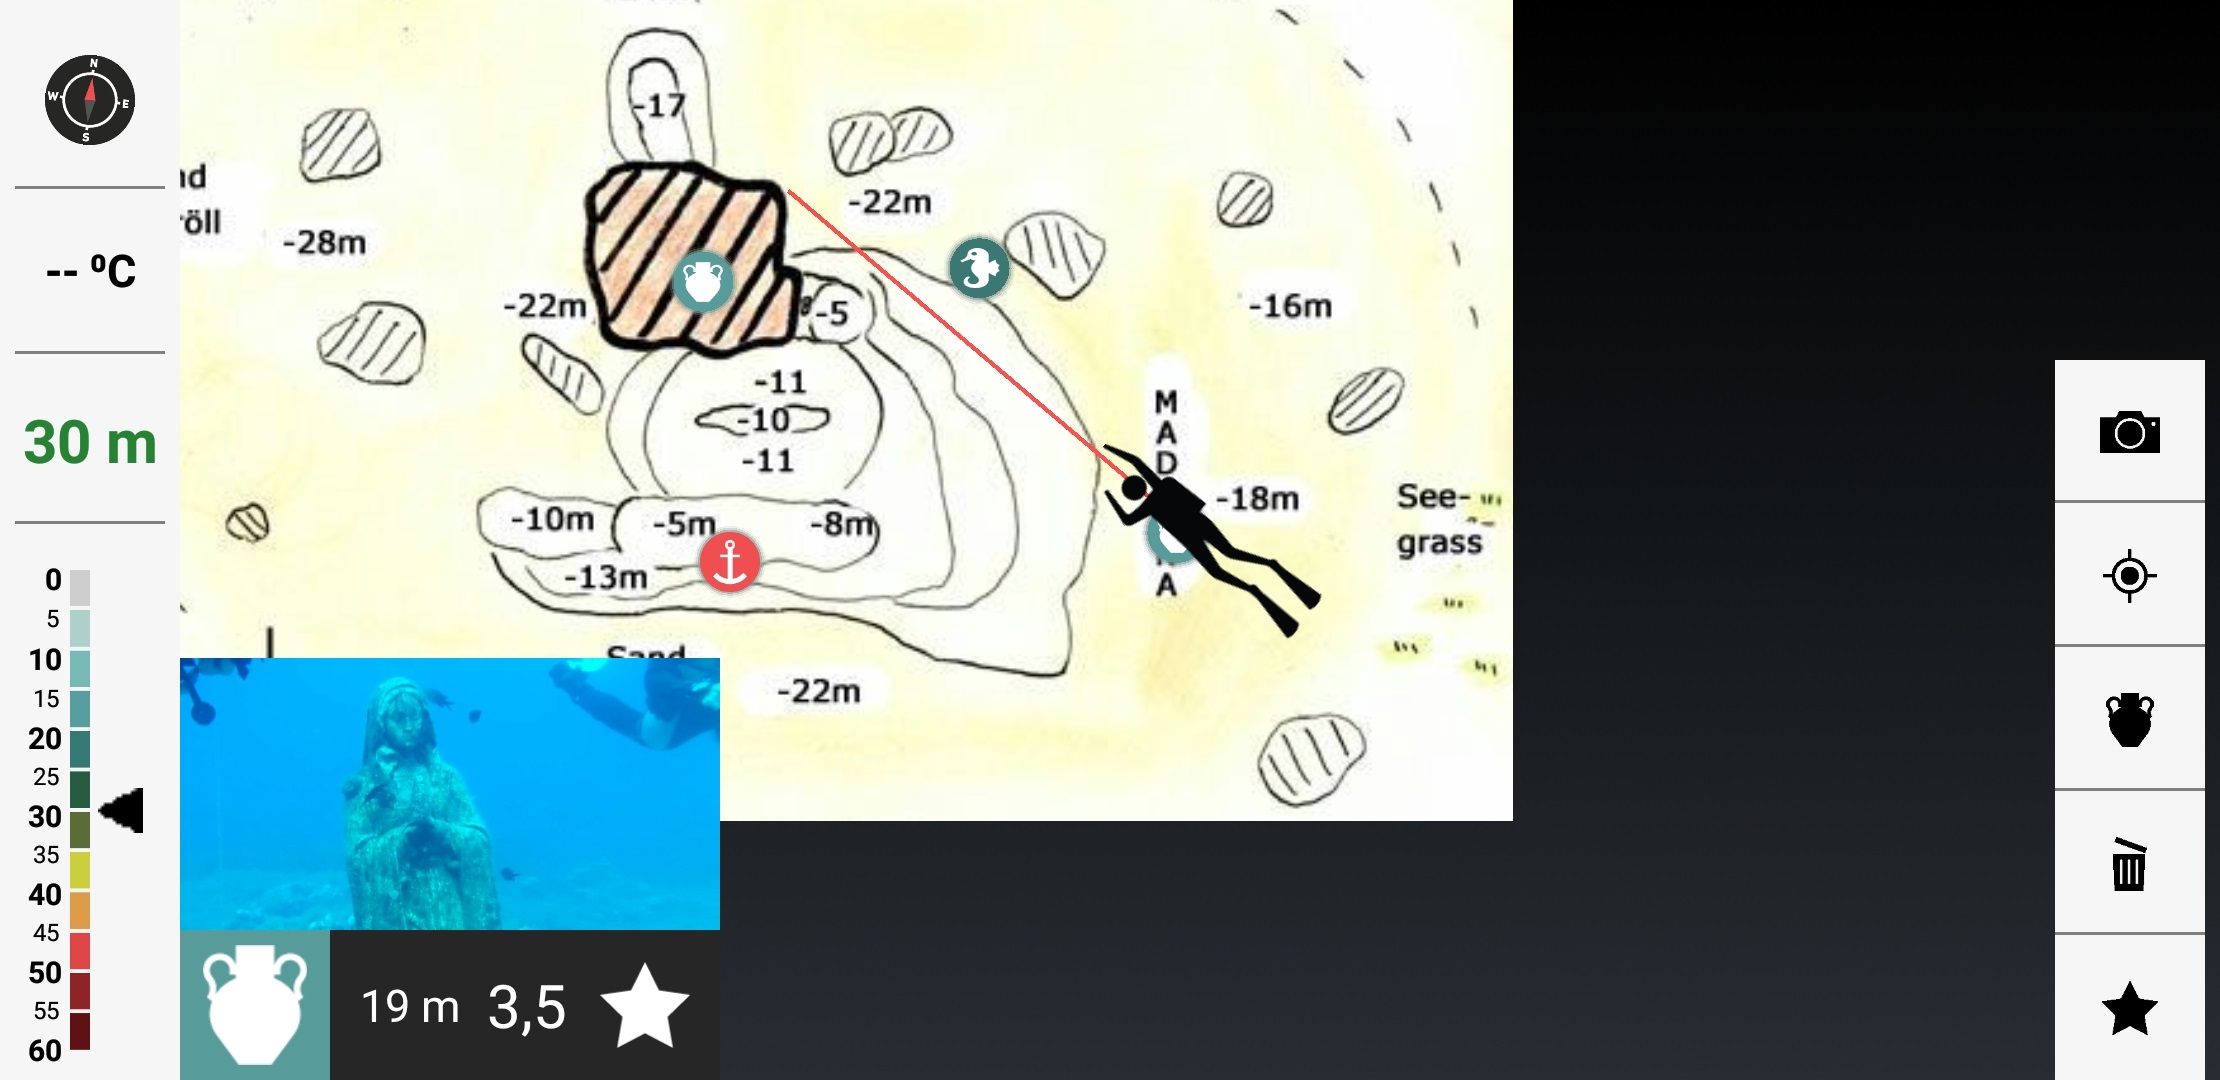
Ponor
Pro ovládání aplikace v průběhu ponoru je využívána kombinace náklonu mobilu (pohyb v menu, posun mapy, zoom mapy a fotoaparátu), a tlačítka pro zvýšení hlasitosti (případně senzoru přiblížení), pro potvrzování akce - nápověda je zobrazována v pravém horním rohu obrazovky.
Více o principech ovládání aplikace pod vodou.
V průběhu ponoru máte k dispozici tyto funkčnosti:
- nastavení pozice na mapě - volba menu POTÁPĚČ, náklon mobilu ve směru pohybu mapy
- přiblížení/oddálení mapy - volba menu POTÁPĚČ, dlouhý stisk tlačítka pro zvýšení hlasitosti (či senzoru přiblížení) + náklon mobilu ve vlevo či vpravo
- nastavení hloubky - volba menu POTÁPĚČ, dlouhý stisk tlačítka pro zvýšení hlasitosti (či senzoru přiblížení) + náklon mobilu ve směru nahoru či dolů
- vycentrování a zobrazení celé mapy - volba menu POZICE (záměrný kříž)
- korekce výchozího bodu a orientace mapy - volba menu KOTVA
- přidání nového objevu - volba menu FOTOAPARÁT
- ovládání DIVETRACERU - volba menu PAUSE zapíná nebo přerušuje automatický pohyb v mapě na základě senzorů mobilu
principy ovládání aplikace pod vodou »
Po ponoru
Po ukončení ponoru přepněte aplikaci zpět do "hladinového módu" (přesuňte přepínač v levém horním rohu obrazovky do leva).
Po ponoru můžete dále spravovat Vaše nové objevy:
- Smažte nechtěné objevy, a ty objevy které nechcete sdílet (všechny pořízené fotky zůstávají i po smazání objevu ve složce fotografií)
- Ořízněte nebo vyměňte za jiné fotografie Vašich objevů
- Změňte vlastnosti Vašich objevů (umístění na mapě, hloubku, kategorii)
(měnit a mazat můžete pouze své objevy)
Navštívené objevy ohodnoťte.
Nezapoměňte ohodnotit ponor (dostupné parametry ponoru budou přednastaveny):
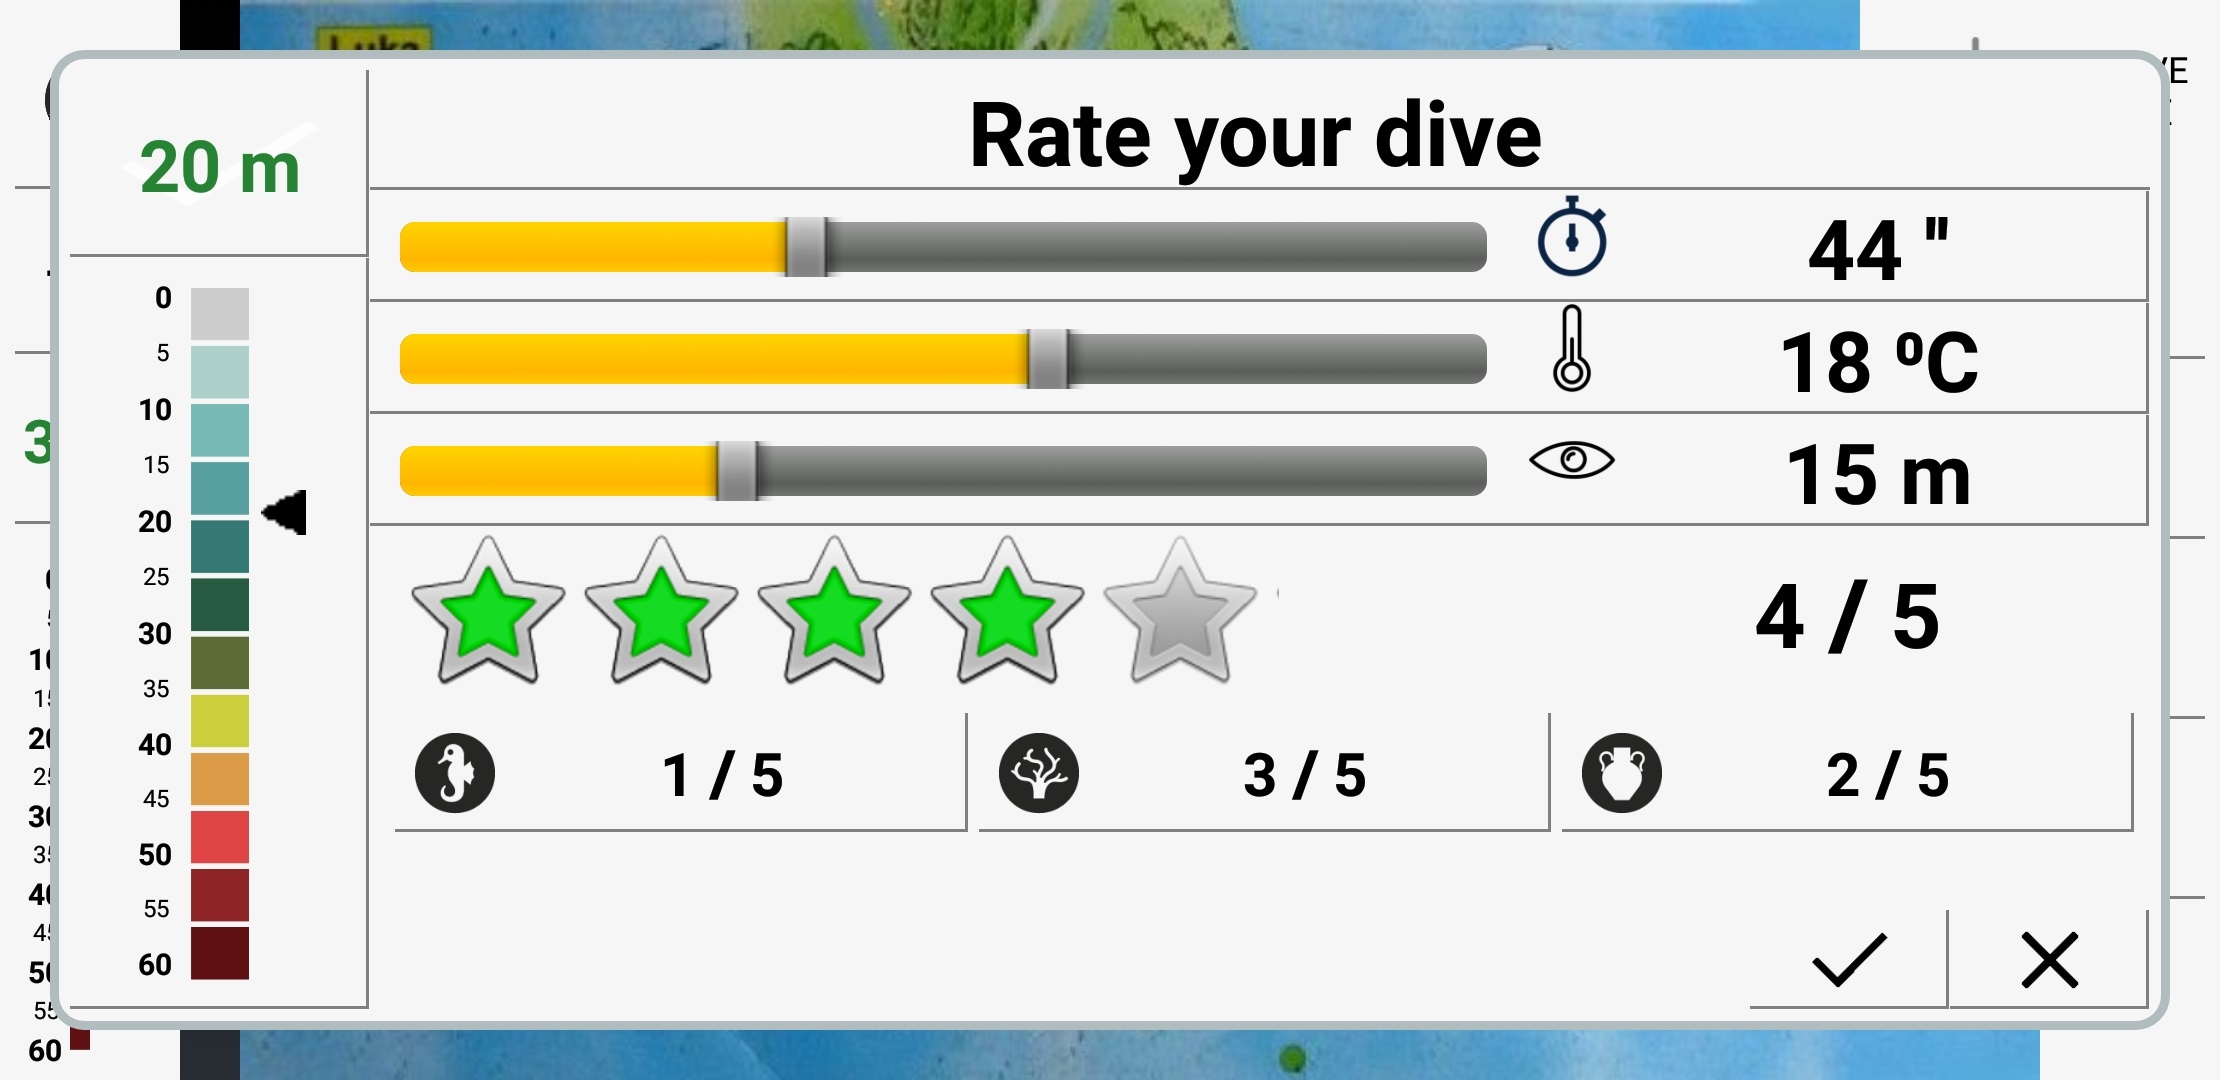
(pokud nejste online, všechna data se odešlou při další synchronizaci)